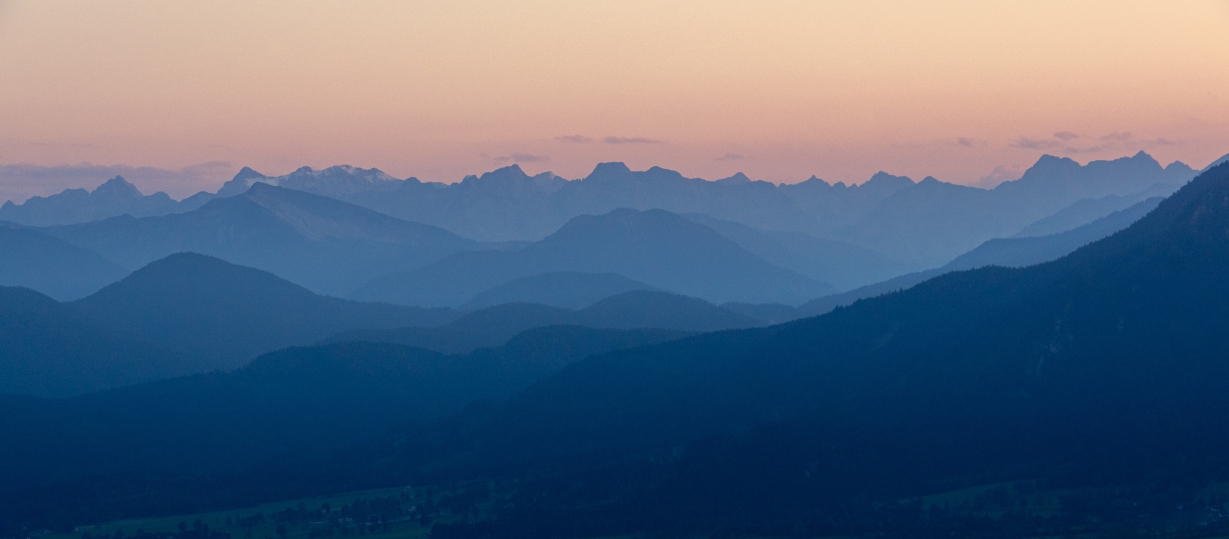
Due to all the HomeOffice I was able to really perceive a lot more of the nature in my home area! One of the things I really started to appreciate are sunsets. Especially the Analemma – in my case the position of the sun at sunset-time. I never was aware before how much in the north the position of the sun is in summer compared to winter times! After a while I started to look for nice weather conditions in order to get nice sunset photos in nearby locations.
This photo was taken on such a hike. Actually, I was aiming for something else, so I was a little disappointed when the weather didn’t turn out the way I wanted. But the mountain ranges in the south drew my attention as it seemed that there are some nice layers there. I couldn’t completely imagine how a nicely cropped and processed shot would look like as the village in the valley didn’t fit to well into the overall composition. So I took some shots with different focal lengths and hopped for a nicely sharp photo.
It is obvious that I did quite a large crop on this shot. In hindsight I should have set up my tripod, put on a zoom lens and should have tried a panorama shot with some photos at a higher focal length. I think this would have saved some details that I now missed. Also, I then would have used a lower ISO and therefore removed some of the noise in the RAW.
Anyways: besides some other corrections, I was quite busy with some of these post processing steps:
- cropping (well obvious!)
- denoising to hide the noise but avoid a too blurred / mushy look
- clearing the sky: stamping out some clouds and reducing clarity to make the sky softer
- improving the color contrast between the sky and the mountain ranges
- enhancing the structure along the mountain ridges so that the layers have clear separate lines
- enhancing the mountain sides in the back which were lit by the sun in order to have some tiny details
Even though it sounds rather easy and straight forward, I think I posted 2-3 different versions online. Each time with a slight improvement over the previous one. Each time a couple of days in between to get a fresh and reset self-critical eye.


Wonderful work! May I ask what you mean by “enhancing the structure along the mountain ridges”? How do you go about doing this?
Hey, thank you very much!
I used the brush tool and drew a stroke along the ridges and increased sharpness / structure. Thus the rest of the image wasn’t over-sharpened but the top of the mountains had a sharp contrast against the background / sky.
Ah okay! This is great advice! Really makes those mountains pop.