In the past weeks I witnessed fantastic afterglows here in the area. In certain conditions a nearby mountain was lit in fiery red while the clouds above while the clouds above were illuminated from the setting sun. Yet this can only happen when the local clouds are high and the sky in the far (where the sun is setting) is either clear or also covered in high clouds. The scene itself usually only last for about 15 minutes. And it looks fantastic. Yet a single cloud in the wrong position can prevent the whole lighting scene. Of course, it would make a great photo! Seen from a nearby hill it could be fantastic!
The next couple of days and weeks I regularly checked the weather conditions in the evening for suitable conditions. Days passed by but I wasn’t in a hurry. Finally, one day the weather looked good, I was in a good mood. Not super perfect but fine. So, I grabbed my photo backpack (about 8kg) and my tripod, rode my bike to the nearby mountain. During the ascent, I already realized … this will not be the day for the desired afterglow. Anyways! I’m already on the way .. give it a try!
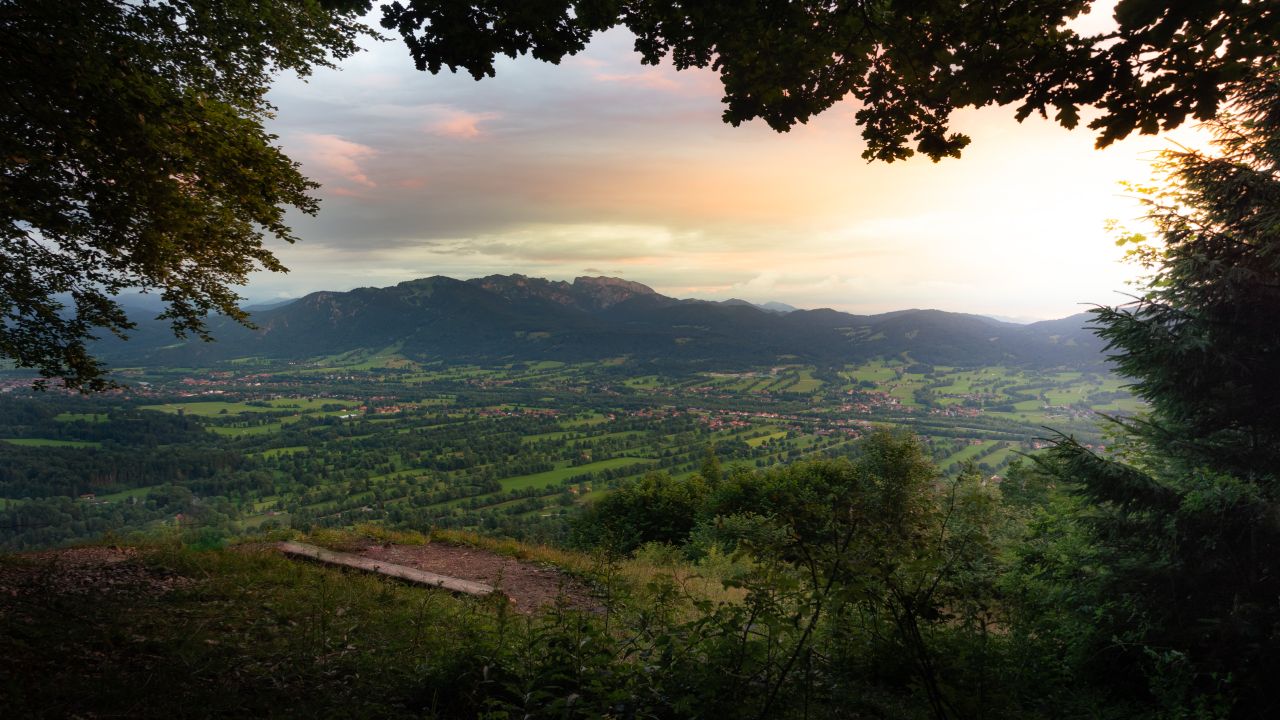
Being at the desired spot I was a little surprised about the amount of people there! Nevertheless, I saw two great motives! As they were quite different, I was really happy to have several lenses with me. The shot below I took with my wide lens. I was glad to have the main motif framed by trees and bushes. The color of the sky was amazing. On the other hand, all the people in the shot … But what could I loose – let’s try!
Back home I reviewed about 75 photos: different angles, exposures, etc. With Lightroom’s repair tool, it seemed to be possible to retouch all the people! The next step was to find a proper crop so that the photo is nicely framed. This seemed promising already. Adding a vignette to darken the edges and reducing the clarity in the edges should draw the viewer’s focus to the middle. The area in the top right should be softer and brighter. So I added a radial filter with a luminosity mask. The mask only selects the bright regions so that the bushes in the foreground are not affected as well. The remaining grad filter, was used to soften and brighten the area. Below you can see the before / after:
Summarizing my trip, I would regard it successful even though I did not get the photo that I originally wanted. But I knew already when I left the house that I would probably need quite a couple of attempts to get the right weather conditions. That’s what hiking photography is about: plan a tour, hope for the best, don’t be disappointed if it’s not exactly as hoped and make the best out of it! In the next post I’ll try to show the other motive that I captured up there.
I’d be glar to read in the comments what you think about the photo, the post or the idea of the hiking nature photography as a topic in general.


The repair tool in Lightroom is my nemesis. I can never seem to get it to look natural and unnoticeable. Alas, I shall try and try again. You did a great job here. 75 photos is about my average to get one good shot too…
Overall, I love to hike with my camera in hand (packing the tripod is a bit more difficult). Ever since I started taking my camera along with me, I have been so much more in tune with my surroundings and so much more appreciative of the beauty of nature. That is one of the main reasons I do this.
Yeah the repair tool can be bitchy. Keep in mind that it has two options: repair and copy. Better try both. Also, I didn’t stamp out the people in one go. The larger the area to stamp, the more separate stamp actions I use.
By the way, I take ways more photos since I have the camera mounted on a clip at the backpack. That was a really good invest!